Create and Run Your First ZK Application with NetBeans and REM"
From Documentation
| (13 intermediate revisions by 4 users not shown) | |||
| Line 1: | Line 1: | ||
| − | {{ | + | {{ZKInstallationGuidePageHeader}} |
| − | |||
__TOC__ | __TOC__ | ||
| + | = Maven Recommended = | ||
| + | The recommended way to use ZK in NetBeans is to import a maven project. Reference [[ZK_Installation_Guide/Setting_up_IDE/Maven/Resolving_ZK_Framework_Artifacts_via_Maven | this document]] for sample pom file. | ||
| + | |||
| + | |||
| + | {{Notice|text=REM is no longer being maintained by its provider and can't work with NetBeans 12 or above. The following sections apply to older NetBeans versions only.}} | ||
| + | |||
| + | =Install NetBeans REM = | ||
[http://rem1.sourceforge.net/ REM] is a NetBeans module for ZK application development contributed by Mr. Sotohiro Terashima. | [http://rem1.sourceforge.net/ REM] is a NetBeans module for ZK application development contributed by Mr. Sotohiro Terashima. | ||
| − | |||
==Install NetBeans== | ==Install NetBeans== | ||
| − | + | [https://netbeans.apache.org/download/index.html Download the latest NetBeans IDE] and install | |
| − | |||
| − | |||
==Install REM plugin== | ==Install REM plugin== | ||
| + | #[http://sourceforge.net/projects/rem1/files/ Download the latest REM plugin]<br/><br/> | ||
| + | #Start NetBeans<br/><br/> | ||
| + | #On NetBeans' main menu bar, select Tools > Plugins.<br/><br/> | ||
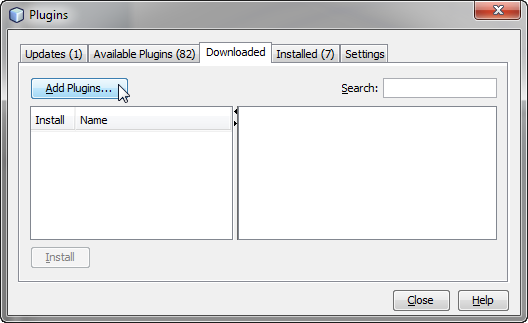
| + | #Click on the "Downloaded" tab, followed by "Add Plugins" to open the file explore<br/>[[Image:ZKInstallationGuide_NetBeans_AddPlugins.png]]<br/><br/> | ||
| + | #Navigate to where REM is downloaded and select the REM plugin<br/><br/> | ||
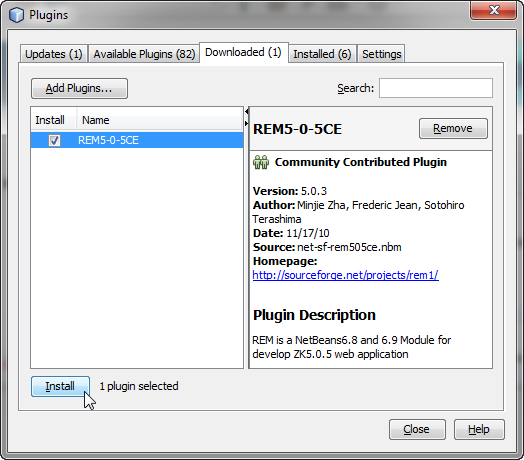
| + | #Click "Install" and follow the NetBeans plugin manager prompts<br/>[[Image:ZKInstallationGuide_NetBeans_InstallPlugin.png]]<br/><br/> | ||
| − | + | =Create a New ZK Project= | |
| + | #On NetBeans main menu bar, select "New Project"<br/><br/> | ||
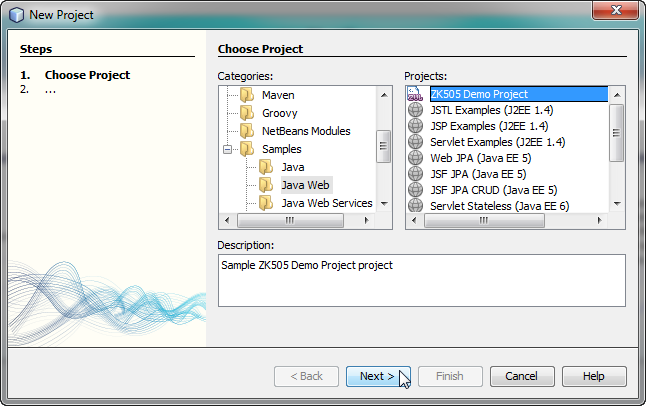
| + | #On the New Project wizard under "Categories", select "Java Web" <br/>[[Image:ZKInstallationGuide_NetBeans_SelectNewZKProject.png]]<br/><br/> | ||
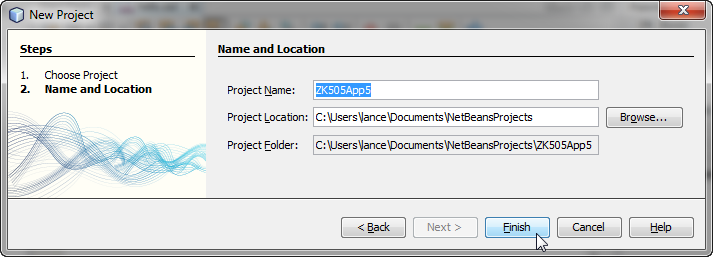
| + | #Confirm and create a new ZK project. <br/>[[Image: ZKInstallationGuide_NetBeans_CreateNewZKProject.png]]<br/><br/> | ||
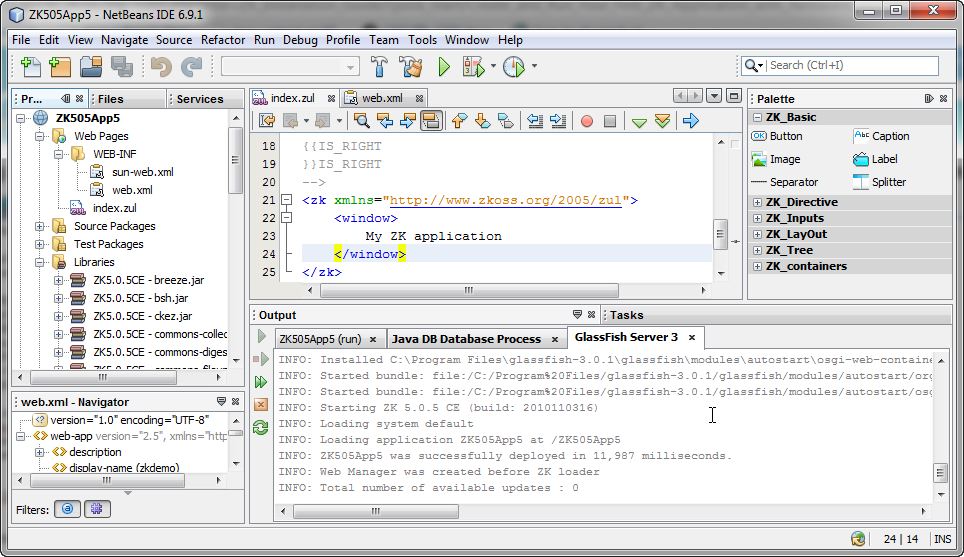
| + | #Select the ZK project folder, and right click "Run" to deploy the project on Glassfish <br/> [[Image:ZKInstallationGuide_NetBeans_RunZKProject.png]]<br/><br/> | ||
| + | =Deploy the ZK Demo Project= | ||
| + | #On NetBeans main menu bar, select "New Project"<br/><br/> | ||
| + | #On the New Project wizard under "Categories", expand the "Samples" folder and select "Java Web" <br/>[[Image:ZKInstallationGuide_NetBeans_SelectNewZKProject.png]]<br/><br/> | ||
| + | #Select "ZK505 Demo Project" under "Projects"<br/><br/> | ||
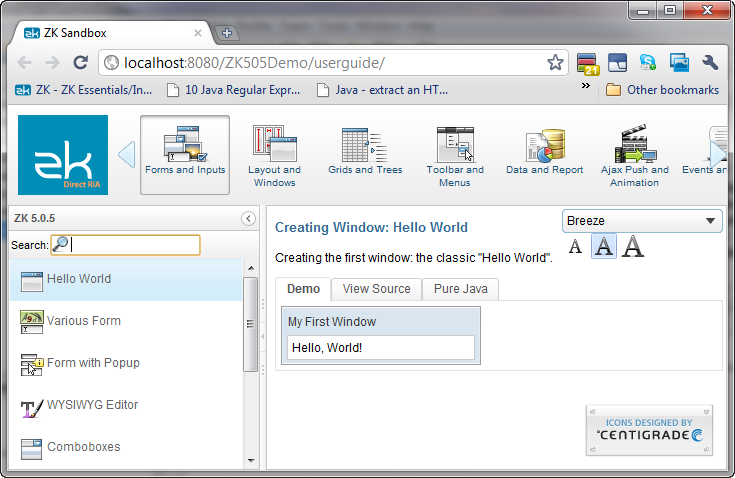
| + | #Select the ZK demo project and right click to select "Run" to deploy the ZK demo <br/> [[Image:ZKInstallationGuide_NetBeans_RunZKDemo.png]] <br/><br/> | ||
=Version History= | =Version History= | ||
Latest revision as of 03:22, 14 October 2020
Maven Recommended
The recommended way to use ZK in NetBeans is to import a maven project. Reference this document for sample pom file.
![]() Notice: REM is no longer being maintained by its provider and can't work with NetBeans 12 or above. The following sections apply to older NetBeans versions only.
Notice: REM is no longer being maintained by its provider and can't work with NetBeans 12 or above. The following sections apply to older NetBeans versions only.
Install NetBeans REM
REM is a NetBeans module for ZK application development contributed by Mr. Sotohiro Terashima.
Install NetBeans
Download the latest NetBeans IDE and install
Install REM plugin
- Download the latest REM plugin
- Start NetBeans
- On NetBeans' main menu bar, select Tools > Plugins.
- Click on the "Downloaded" tab, followed by "Add Plugins" to open the file explore
- Navigate to where REM is downloaded and select the REM plugin
- Click "Install" and follow the NetBeans plugin manager prompts


Create a New ZK Project
- On NetBeans main menu bar, select "New Project"
- On the New Project wizard under "Categories", select "Java Web"
- Confirm and create a new ZK project.
- Select the ZK project folder, and right click "Run" to deploy the project on Glassfish


Deploy the ZK Demo Project
- On NetBeans main menu bar, select "New Project"
- On the New Project wizard under "Categories", expand the "Samples" folder and select "Java Web"
- Select "ZK505 Demo Project" under "Projects"
- Select the ZK demo project and right click to select "Run" to deploy the ZK demo

Version History
| Version | Date | Content |
|---|---|---|