Auto Fill - Drag Fill"
From Documentation
m (→Fill cell) |
m (→Fill cell) |
||
| Line 70: | Line 70: | ||
Fill right | Fill right | ||
| − | <source lang="java" high=" | + | <source lang="java" high="10,11"> |
Button fillRight; | Button fillRight; | ||
public void onClick$fillRight() { | public void onClick$fillRight() { | ||
| Line 86: | Line 86: | ||
Fill left | Fill left | ||
| − | <source lang="java" high=" | + | <source lang="java" high="10,11"> |
Button fillLeft; | Button fillLeft; | ||
public void onClick$fillLeft() { | public void onClick$fillLeft() { | ||
| Line 102: | Line 102: | ||
Fill up | Fill up | ||
| − | <source lang="java" high=" | + | <source lang="java" high="10,11"> |
Button fillUp; | Button fillUp; | ||
public void onClick$fillUp() { | public void onClick$fillUp() { | ||
Revision as of 11:33, 19 November 2010
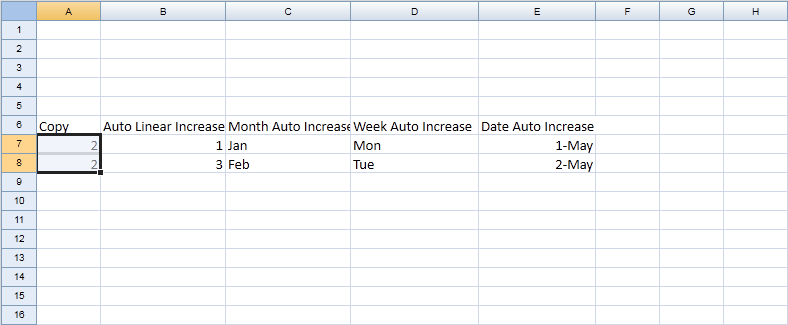
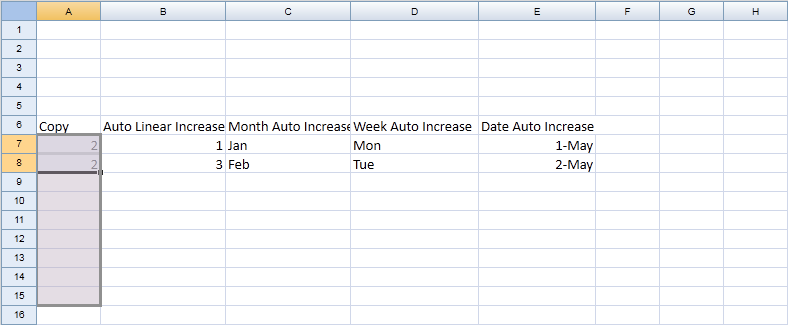
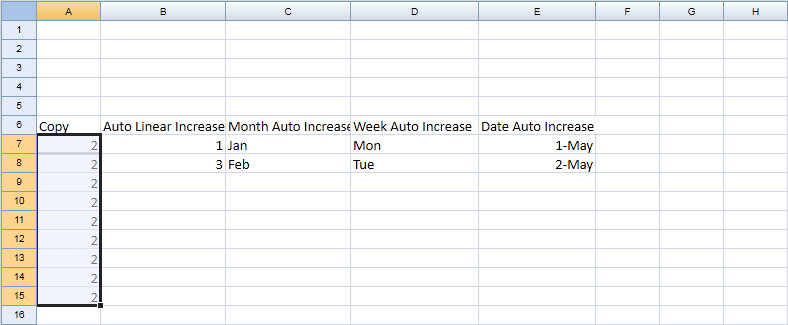
You can drag the Fill Handle(the small black square at the bottom right) to copy cells in a simple dragging. The drag fill is base on Range's fill functions.
1. Select a range

2. Mouse over right bottom border, mouse cursor will change to cross, drag to expend selection range

3. Release mouse to perform auto fill

Fill in range
Scenario
User can input how many rows or how many columns to fill from a selected cell.
ZUML Example
<zk>
<div height="100%" width="100%" apply="demo.AutofillComposer">
	<div height="3px"></div>
	<div>
	Fill rows <intbox id="rows"/>, columns <intbox id="columns"/>
	</div>
	<div>
		<button id="fillDown" label="Fill down" mold="trendy"></button>
		<button id="fillRight" label="Fill right" mold="trendy"></button>
		<button id="fillLeft" label="Fill left" mold="trendy"></button>
		<button id="fillUp" label="Fill up" mold="trendy"></button>
		<button id="autofill" label="Auto fill" mold="trendy"></button>
	</div>
	<spreadsheet id="spreadsheet" src="/Untitled"
			maxrows="200"
			maxcolumns="40"
			width="100%"
			height="450px"></spreadsheet>
</div>
</zk>
Source cell
We can use onCellFocused event to get the cell as source to copy.
Spreadsheet spreadsheet;
Cell currentCell;
public void onCellFocused$spreadsheet(CellEvent event) {
	currentCell = Utils.getCell(event.getSheet(), event.getRow(), event.getColumn());
}
Fill cell
Fill down
Intbox rows;
Intbox columns;
Button fillDown;
public void onClick$fillDown() {
	Integer rowNum = rows.getValue();
	if (currentCell == null || rowNum == null)
		return;

	Sheet sheet = spreadsheet.getSelectedSheet();
	int top = currentCell.getRowIndex();
	int left = currentCell.getColumnIndex();
	Range downRange = Ranges.range(sheet, top, left, top + rowNum, left);
	downRange.fillDown();
}
Fill right
Button fillRight;
public void onClick$fillRight() {
	Integer colNum = columns.getValue();
	if (currentCell == null || colNum == null)
		return;

	Sheet sheet = spreadsheet.getSelectedSheet();
	int top = currentCell.getRowIndex();
	int left = currentCell.getColumnIndex();
	Range rightRange = Ranges.range(sheet, top, left, top, left + colNum);
	rightRange.fillRight();
}
Fill left
Button fillLeft;
public void onClick$fillLeft() {
	Integer colNum = columns.getValue();
	if (currentCell == null || colNum == null)
		return;

	Sheet sheet = spreadsheet.getSelectedSheet();
	int top = currentCell.getRowIndex();
	int left = currentCell.getColumnIndex();
	Range leftRange = Ranges.range(sheet, top, left - colNum, top, left);
	leftRange.fillLeft();
}
Fill up
Button fillUp;
public void onClick$fillUp() {
	Integer rowNum = rows.getValue();
	if (currentCell == null || rowNum == null)
		return;

	Sheet sheet = spreadsheet.getSelectedSheet();
	int top = currentCell.getRowIndex();
	int left = currentCell.getColumnIndex();
	Range upRange = Ranges.range(sheet, top - rowNum, left, top, left);
	upRange.fillUp();
}
Version History
| Version | Date | Content |
|---|---|---|
All source code listed in this book is at Github.