Get ZK Up and Running with MVC"
| Line 216: | Line 216: | ||
=Sketch User Interface = | =Sketch User Interface = | ||
| − | In ZK, you can use a XML-formatted language, | + | Design UI is a good step to start building an application. In ZK, you can use a XML-formatted language, ZK User Interface Markup Language ([[ZUML Reference| ZUML]]), to describe user interface. Each XML element represents a component and each XML attribute is used to configure a component. For example, the following code create a window with specified title and normal border. |
<source lang="xml"> | <source lang="xml"> | ||
| + | <window title="My First ZK Application" border="normal"> | ||
| + | </window> | ||
| + | </source> | ||
| − | + | Here is the complete code of our target application UI: | |
| + | |||
| + | '''searchMvc.zul''' | ||
| + | <source lang="xml"> | ||
| + | |||
| + | <window title="Search Product" width="800px" border="normal" | ||
style="padding-top:10px;padding-left:10px;" apply="tutorial.SearchProductComposer"> | style="padding-top:10px;padding-left:10px;" apply="tutorial.SearchProductComposer"> | ||
<vlayout> | <vlayout> | ||
| − | <vlayout > | + | <vlayout> |
<hlayout> | <hlayout> | ||
| − | <textbox /> | + | <textbox id="keywordBox"/> |
| − | <button label="search" image="img/search.png"/> | + | <button id="searchButton" label="search" image="img/search.png"/> |
</hlayout> | </hlayout> | ||
<listbox id="productListbox" mold="paging" pageSize="5"> | <listbox id="productListbox" mold="paging" pageSize="5"> | ||
| + | <listhead> | ||
| + | <listheader label="Name"/> | ||
| + | <listheader label="Price"/> | ||
| + | </listhead> | ||
<template name="model" > | <template name="model" > | ||
<listitem> | <listitem> | ||
<listcell label="${each.name}"></listcell> | <listcell label="${each.name}"></listcell> | ||
| + | <listcell >$<label value="${each.price}"/></listcell> | ||
</listitem> | </listitem> | ||
</template> | </template> | ||
| Line 237: | Line 250: | ||
</vlayout> | </vlayout> | ||
<separator bar="true" height="10px" /> | <separator bar="true" height="10px" /> | ||
| − | + | <hbox id="detailArea" > | |
| − | + | <image id="thumbImage" width="250px"/> | |
| − | + | <vlayout> | |
| − | + | <label id="nameLabel" /> | |
| − | + | <label id="priceLabel" /> | |
| − | + | <label id="descriptionLabel" style="display:inline"/> | |
| − | + | </vlayout> | |
| − | + | </hbox> | |
</vlayout> | </vlayout> | ||
</window> | </window> | ||
Revision as of 07:02, 3 July 2012
Introduction
In this tutorial, we will teach you how to build a web application with ZK. The target application we are going to build is a bookstore catalog application.
You can take look at this application's live demo.
Installation
In this section, we'll tell you how to setup up ZK in a web application project.
Prerequisite
We use eclipse IDE 3.7 (indigo) for Java EE developer (Download it) to demonstrate the whole instructions.
Add a Server Runtime Environment
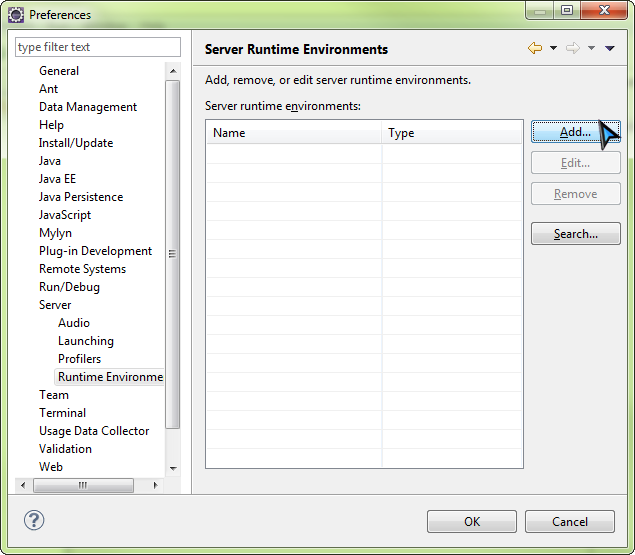
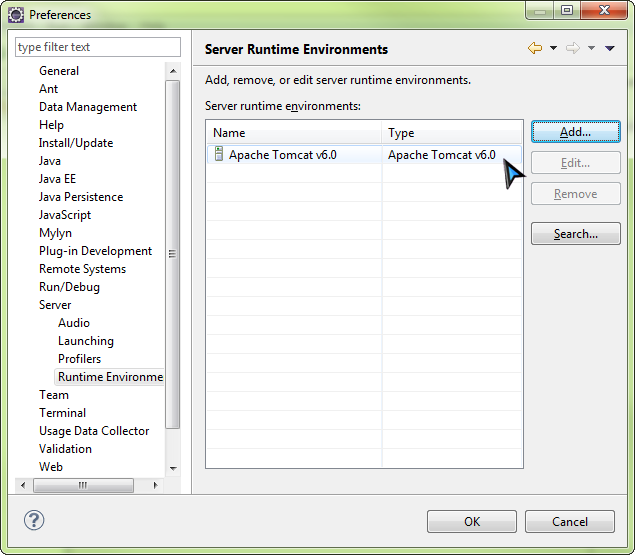
A web application project needs an application server environment to run. In eclipse menu, select Window \ Preferences, in Preferences window, select Server\Runtime Environments. Click Add button to add a server runtime environment.
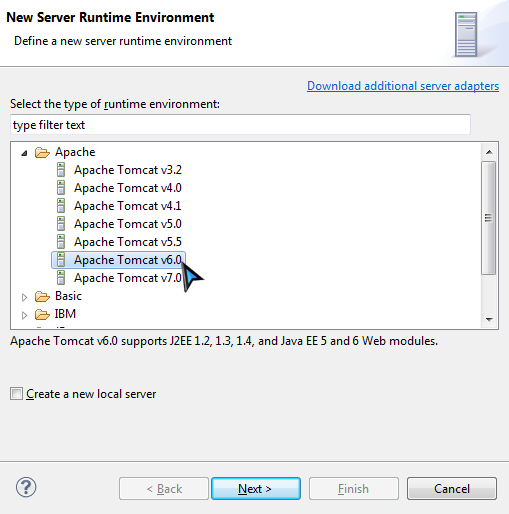
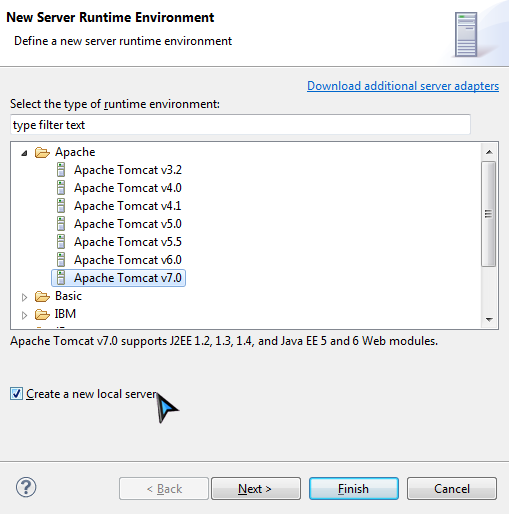
Select Apache Tomcat v6.0 as our environment, click Next.
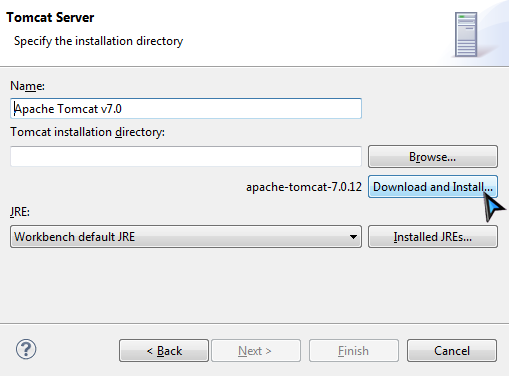
If you have installed Tomcat before, just provide your path. If you don't, just click Download and Install button and choose a folder, wait for a while, eclipse will download and install Tomcat for you. After installation is complete, the Finish button will become enabled. Click it to finish adding server runtime.
You shall see a entry like the following in your Server Runtime Environment.
Create a Web Project
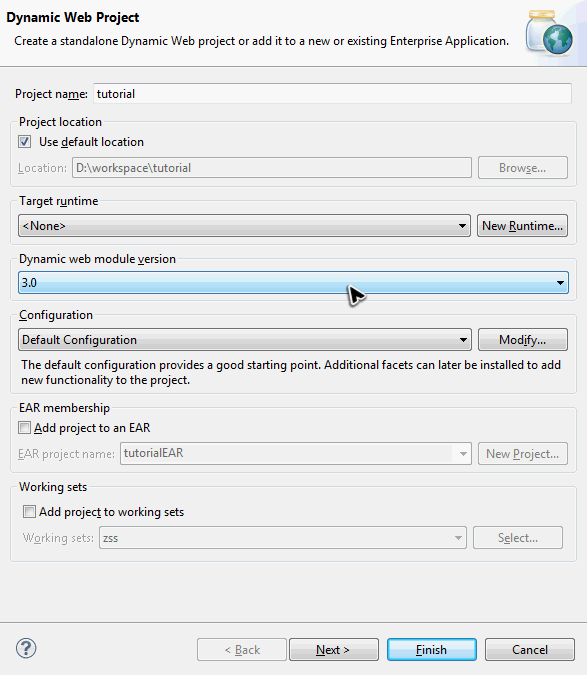
In eclipse, select File \ New \ Dynamic Web Project, enter zktutorial in Project name, select 2.4 for Dynamic web module version and keep every thing else default.
Download
Download the ZK CE (file name should be zk-bin-6.0.0.zip) and extract it to a folder.
Add ZK JAR to Your Project
To use ZK in your project, you have to add ZK JAR into your project's library folder.
Copy JAR files under following list to zktutorial/WEB-INF/lib:
- {YOUR_ZK_UNZIP_FOLDER}/dist/lib
- {YOUR_ZK_UNZIP_FOLDER}/dist/lib/ext
If your project use maven, please add following dependencies:
		<dependency>
			<groupId>org.zkoss.zk</groupId>
			<artifactId>zkbind</artifactId>
			<version>6.0.0</version>
		</dependency>
Configure web.xml
By default, eclipse creates a default web.xml under [PROJECT_NAME]/WebContent/WEB-INF. You just add line 15 to 42 of the following sample web.xml to your project and the configuration is complete.
<?xml version="1.0" encoding="UTF-8"?>
<web-app version="2.4" xmlns="http://java.sun.com/xml/ns/j2ee"
 xmlns:xsi="http://www.w3.org/2001/XMLSchema-instance"
 xsi:schemaLocation="http://java.sun.com/xml/ns/j2ee http://java.sun.com/xml/ns/j2ee/web-app_2_4.xsd">

	<display-name>zktutorial</display-name>
	<welcome-file-list>
		<welcome-file>index.zul</welcome-file>
		<welcome-file>index.zhtml</welcome-file>
		<welcome-file>index.html</welcome-file>
		<welcome-file>index.htm</welcome-file>
	</welcome-file-list>

    <!-- ZK -->
    <listener>
        <description>ZK listener for session cleanup</description>
        <listener-class>org.zkoss.zk.ui.http.HttpSessionListener</listener-class>
    </listener>
    <servlet>
        <description>ZK loader for ZUML pages</description>
        <servlet-name>zkLoader</servlet-name>
        <servlet-class>org.zkoss.zk.ui.http.DHtmlLayoutServlet</servlet-class>
        <init-param>
            <param-name>update-uri</param-name>
            <param-value>/zkau</param-value>
        </init-param>
        <load-on-startup>1</load-on-startup>
    </servlet>
    <servlet-mapping>
        <servlet-name>zkLoader</servlet-name>
        <url-pattern>*.zul</url-pattern>
    </servlet-mapping>

    <servlet>
        <description>The asynchronous update engine for ZK</description>
        <servlet-name>auEngine</servlet-name>
        <servlet-class>org.zkoss.zk.au.http.DHtmlUpdateServlet</servlet-class>
    </servlet>
    <servlet-mapping>
        <servlet-name>auEngine</servlet-name>
        <url-pattern>/zkau/*</url-pattern>
    </servlet-mapping>

</web-app>
- Line 4: this sample is for Servlet 2.4. There are other samples for Servlet 2.3 and Servlet 3.0
Verify Installation
After installation, you can create a simple zul to verify the installation works or not. In eclipse, select File / New / File or File / New / Other / File to add a new file, hello.zul, under WebContent. Copy and paste the following sample code into hello.zul and save it.
hello.zul
 <window title="My First ZK Application" border="normal">
 	Hello World!
 </window>
Add a Server in eclipse
Right click on your project root folder, in context menu, select Run As / Run on Server to run this project on an application server.
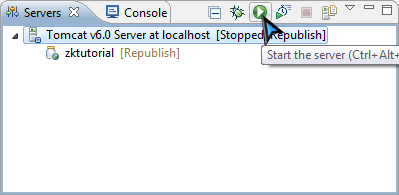
If you have defined servers before, choose an existing server. If you don't, select Manually define a new server and select Tomcat v6.0 Server as we previously installed server runtime environment. Then click "Finish" and you can see a "Tomcat v6.0 Server" item in the Servers view.
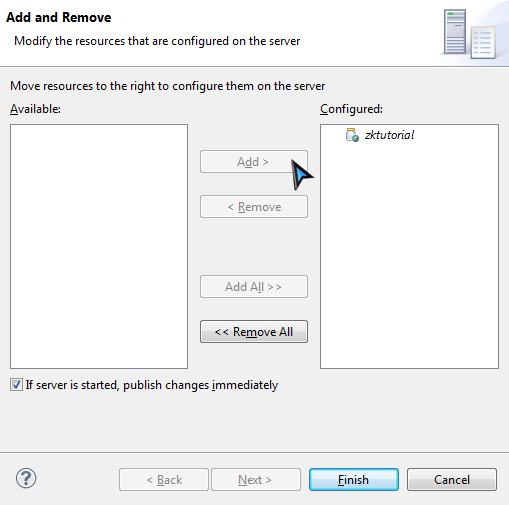
If your eclipse contains only one dynamic web project, that project should already be configured to deploy on Tomcat you just created. If there is no project under your Tomcat server, you still can add your web project manually. Right click Tomcat server, select Add and Remove.... Select your project from left side "Available", click "Add >" button to add a project to deploy on Tomcat server.
You can see a jar icon with project name under your Tomcat server. That means zktutorial is configured to deploy on Tomcat v6.0.
Eclipse let users to start, stop, and deploy a web application to an application server through "Servers" view. Click start icon to start server or right click on zktutorial root folder and select Run As / Run on Server to run the project.
Open your browser to visit http://localhost:8080/hello.zul. If you can see the following image, then your installation is success.
The Domain in This Tutorial
Our target application is a bookstore catalog that allows users to search and view book's detail including name, price, description, and cover preview. The following is the domain object that represents a book.
public class Book {
	private Integer id;
	private String name;
	private String thumbnail;
	private String description;
	private Float price;
	//omit getter and setter for brevity
}
Then we can define a service class to perform the business logic (search books) as follows:
public interface BookService {

	/**
	 * Retrieve all books in the bookstore.
	 * @return all books
	 */
	public List<Book> findAll();

	/**
	 * search books according to keyword.
	 * @param keyword book name's keyword
	 * @return list of book that match the keyword
	 */
	public List<Book> search(String keyword);
}
Sketch User Interface
Design UI is a good step to start building an application. In ZK, you can use a XML-formatted language, ZK User Interface Markup Language ( ZUML), to describe user interface. Each XML element represents a component and each XML attribute is used to configure a component. For example, the following code create a window with specified title and normal border.
 <window title="My First ZK Application" border="normal">
 </window>
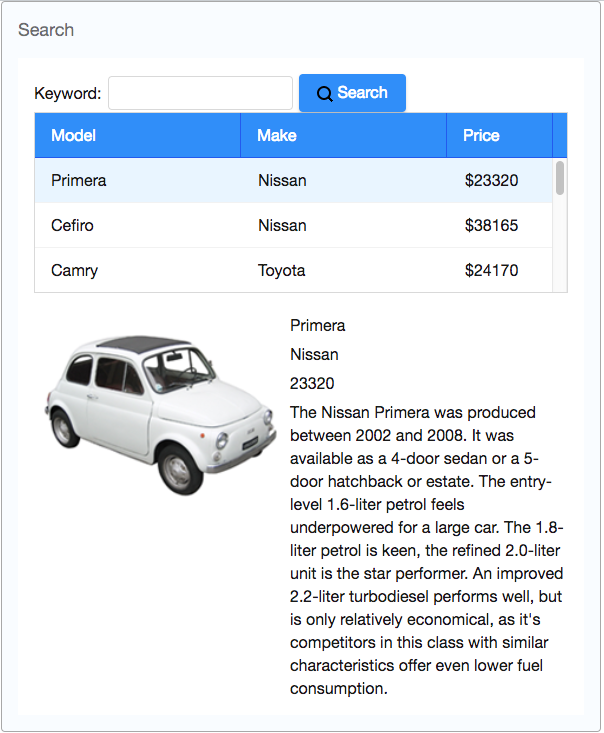
Here is the complete code of our target application UI:
searchMvc.zul
	<window title="Search Product" width="800px" border="normal"
	 style="padding-top:10px;padding-left:10px;" apply="tutorial.SearchProductComposer">
		<vlayout>
			<vlayout>
				<hlayout>
					<textbox id="keywordBox"/>
					<button id="searchButton" label="search" image="img/search.png"/>
				</hlayout>
				<listbox id="productListbox" mold="paging" pageSize="5">
					<listhead>
						<listheader label="Name"/>
						<listheader label="Price"/>
					</listhead>
					<template name="model" >
						<listitem>
							<listcell label="${each.name}"></listcell>
							<listcell >$<label value="${each.price}"/></listcell>
						</listitem>
					</template>
				</listbox>
			</vlayout>
			<separator bar="true" height="10px" />
			<hbox id="detailArea" >
				<image id="thumbImage" width="250px"/>
				<vlayout>
					<label id="nameLabel" />
					<label id="priceLabel" />
					<label id="descriptionLabel" style="display:inline"/>
				</vlayout>
			</hbox>
		</vlayout>
	</window>
Manipulate UI
The next step after sketching the UI is to make UI interact with user. We change the UI dynamically by controlling UI component Java object directly.
UI Controller
In order to control UI, you have to create a controller class.
Stuff a bunch of data
We hope users can see a list of books when the page shows up.
Handling User Action
When users select a listitem, we should show them the detail.
Bind UI Automatically
Binding data
Handling UI commands
Patterns Comparison
MVC v.s MVVM
When to use
Restriction
Unit Test ZK Application
ZK provides a unit test library, Mimic, which is one module of ZK Application Test Suite (ZATS).
