HOWTO Create An App Engine Project With ZkStudio Helios
This tutorial is the first of several I will be creating on the process of using Google App Engine along with JPA and ZK Studio to produce a finished product. The series will cover everything from beginning to end and when we are done, we will have created a true enterprise application.
So lets begin.
Meet AIMEE.
AIMEE stands for Advanced Infrastructure Monitoring for Enterprise Environments.
AIMEE is available as both a commerical & open source offering from Adder & Mason
It's intended as replacement for Nagios, OpenView and the various other monitoring products that are out there.
The idea for AIMEE came from a series of projects we worked on, that involved designing and deploying large scale monitoring infrastructures for mission critical systems at Fortune 500 companies.
Design Goals
The overall design for AIMEE required the following items to be met.
- Easy to deploy
- Easy to manage
- Compatibility with existing products & solutions
- Scalable
- Efficient
- Flexibility
- Customisability
- Cross-platform
Java was chosen as the language because of items 1, 6 & 8
Google App Engine was chosen as a platform because of items, 1, 2, & 4
JPA was chosen as a persistence framework because it was known to work well with App Engine.
Zk was chosen to provide all of the front end UI because after careful evaluation of several similar products, including Googles own GWT framework, it turned out to be the best.
Finally Eclipse was chosen because it turned out to be the best IDE for working with all these disparate components.
Now we've laid out our design goals, lets get down to business.
Setting up our environment
The first thing we need to do is download eclipse for Java EE Next you need to install the Google Plugin for eclipse. Finally, install ZK Studio Once installed Zk will ask you to activate it. Make sure to do this step as well.
Configuring a Project
The steps to configure a new project are as follows
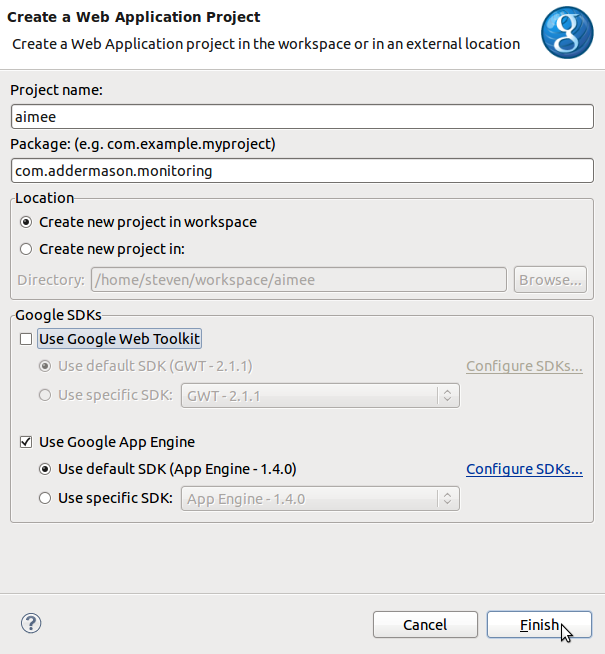
- Create a new Web Application Project, make sure to uncheck GWT toolkit if it's checked.
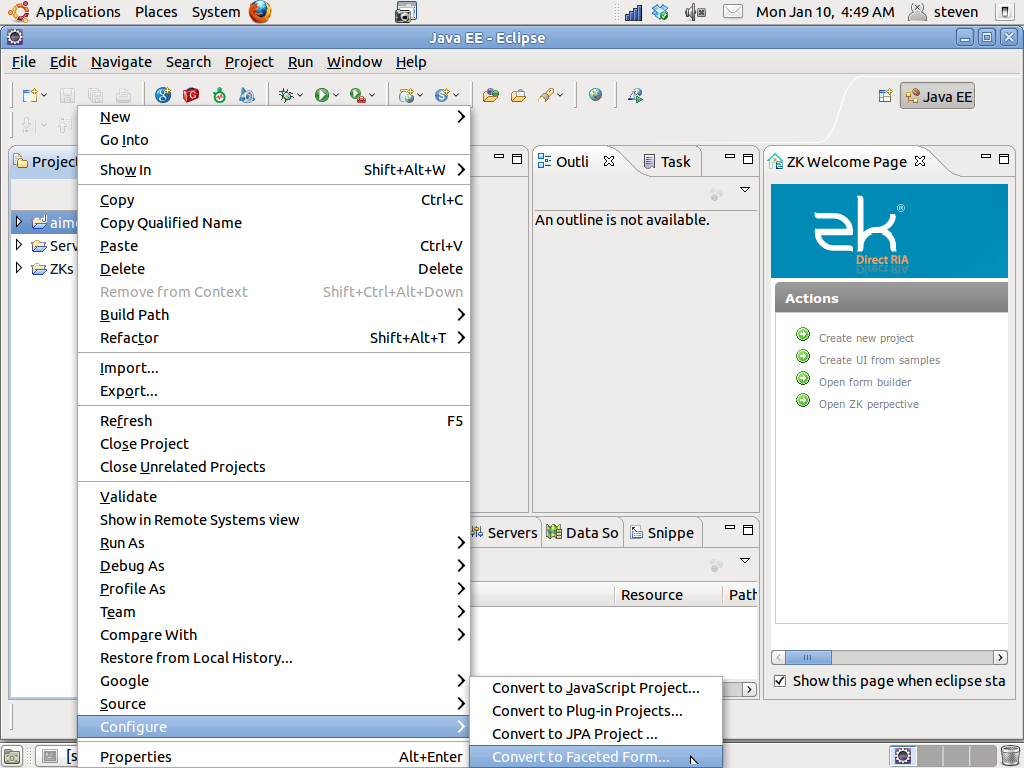
- Right click on your new project, go to "Configure", select "Convert to Faceted Form"
- Make sure to select & configure the following facets
- Dynamic Web Module 2.5
- ZK Supports


Once you click apply eclipse will activate the facets for you and you have a project "almost" ready to deploy to app engine. Your next step is to configure Zk to play nicely with app engine.
These instructions were borrowed from A another tutorial on the subject and are included here for reference purposes only.
The web.xml File
The content is similar to other ZK application except the AU engine has to be mapped to /zkau, too (in additions to /zkau/*. Otherwise, AU requests won't be sent to the AU engine. Here is is an example.
<web-app xmlns="http://java.sun.com/xml/ns/javaee" version="2.5">
	<listener>
		<description>ZK listener for session cleanup</description>
		<listener-class>org.zkoss.zk.ui.http.HttpSessionListener</listener-class>
	</listener>

	<servlet>
		<servlet-name>zkLoader</servlet-name>
		<servlet-class>org.zkoss.zk.ui.http.DHtmlLayoutServlet</servlet-class>
		<init-param>
			<param-name>update-uri</param-name>
			<param-value>/zkau</param-value>
		</init-param>
		<load-on-startup>1</load-on-startup>
	</servlet>
	<servlet>
		<servlet-name>auEngine</servlet-name>
		<servlet-class>org.zkoss.zk.au.http.DHtmlUpdateServlet</servlet-class>
	</servlet>
	<servlet-mapping>
		<servlet-name>zkLoader</servlet-name>
		<url-pattern>*.zul</url-pattern>
	</servlet-mapping>
	<servlet-mapping>
		<servlet-name>auEngine</servlet-name>
		<url-pattern>/zkau/*</url-pattern>
	</servlet-mapping>
	<servlet-mapping>
		<servlet-name>auEngine</servlet-name>
		<url-pattern>/zkau</url-pattern>
	</servlet-mapping>
	<welcome-file-list>
		<welcome-file>index.zul</welcome-file>
		<welcome-file>index.zhtml</welcome-file>
		<welcome-file>index.html</welcome-file>
	</welcome-file-list>
</web-app>
The zk.xml File
Google App Engine is a cloud service, so you have to enable the clustering: disable event threads and use serializable UI factory. In addition, Google App Engine doesn't allow users to create a working thread, so we have to disable the resend mechanism.
Here is an example.
<zk>
	<!-- clustering environment -->
	<system-config>
		<disable-event-thread/>
		<ui-factory-class>org.zkoss.zk.ui.http.SerializableUiFactory</ui-factory-class>
	</system-config>

	<!-- GAE doesn't allow user's thread -->
	<client-config>
		<resend-delay>-1</resend-delay>
	</client-config>
</zk>
The appengine-web.xml File
App Engine requires one addition configuration file named appengine-web.xml. It resides in the WEB-INF directory.
<sessions-enabled>true</sessions-enabled>

<static-files>
	<exclude path="/**.zul"/>
	<exclude path="/**.zhtml"/>
</static-files>
<resource-files>
	<include path="/**.zul"/>
	<include path="/**.zhtml"/>
</resource-files>
That's everything you need to do, to get your project App Engine & Zk ready. At this point you could deploy the project & try it out.
Stay tuned next time, when we discuss how to create the domain (data) objects, persist them & display them in a Zk app.